

Do you prefer to use Google Assistant on your PC rather than Microsoft’s Cortana or Amazon’s Alexia? Then this article is specially curated for you. Apparently, there’s no easy, quick, and direct way to do it, as there’s no Google Assistant App available for Windows, you’ve to take the indirect path. This guide will teach you how to get a Google wizard on Windows 10 as well as on a Chrome OS system. or a Chromebook.
Before we get started you are required to have a Google Account if not create one.
- For Windows, use Python, Google Cloud Platform, and the Google Assistant API to install Google Assistant.
- For Chromebook or Chrome OS device, enable Google Assistant in Settings.
How To Get Google Assistant For PC
To get Google Assistant for PC, you will need to download and install Python on your Windows PC first. Remember to check the box next to Add Python 3.8 to PATH. After installing Python for Windows, proceed as follows:
Step 1: Open the Windows Explorer and create a new folder named Google Assistant in C: Drive.
Step 2: Next, open Google Cloud Platform in your web browser, and choose to create Project If you are asked to sign up, use your Google Account credential to log in. 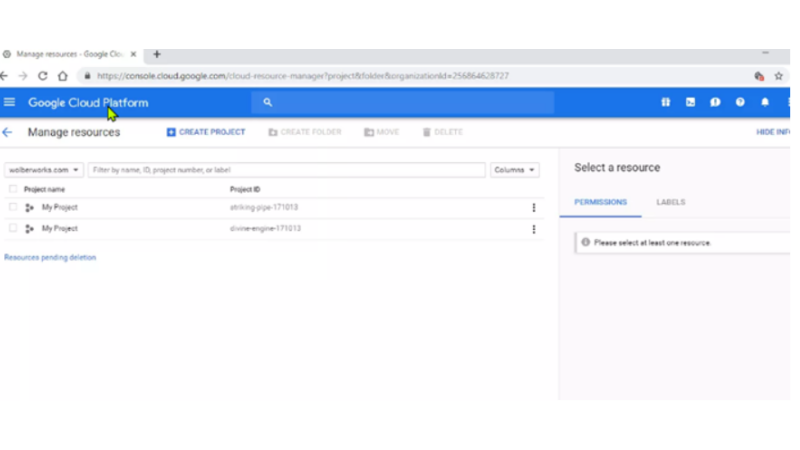
Step 3: To name your project use WindGoogleAssistant. You’ll see a Project ID under your project name, make a note of it as it will be needed afterwards while using Google Assistant on your Windows PC.
Step 4: Now click on the Create tab.
Also Read | How To Turn On Bluetooth On Windows 10 – Complete Guide With Screenshots
Step 5: Then, activate the Google Assistant APIs in your browser and choose Enable to switch on the Google Assistant API for your project. Click Create Credentials afterwards. 
Step 6: Add the following Credentials to your Project screen
- Which API are you using? – Google Assistant API
- Where will you be calling the API form? – Other UIs {Windows, CLI Tools)
- What data will you be accessing? – User data
Step 7: Once you submit the response click on – What credentials do I need?
Step 8: Now click on Setup Consent Screen and change application type to internal. Then use WinGoogleAssistant in the application name and Save. 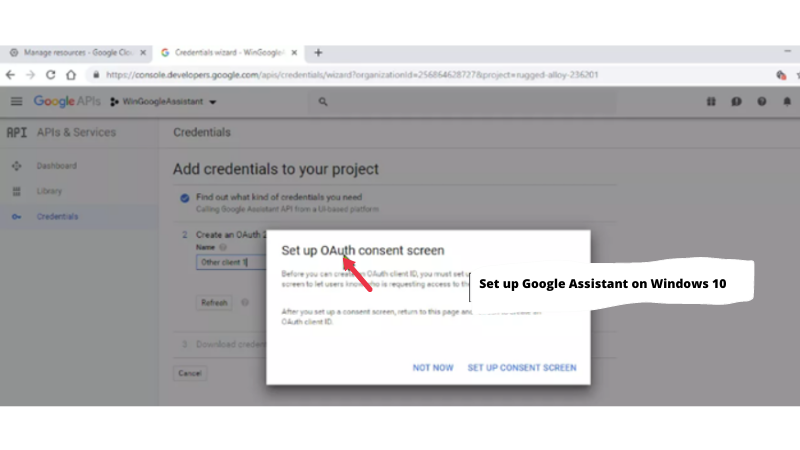 Step 9: Further, Create Credentials>Help me Choose and repeat step 6.
Step 10: In the name box, type WGAcredentials and click on Create OAuth Client ID. Download the credentials and click Done.
Step 11: Click the Downwards Arrow to install the JSON file and save it in the folder named Google Assistant that you created in Step 1.
Step 12: Now press Windows + R key and enter cmd in the Run dialog box and press Enter to open Command Prompt. Copy and paste the below syntax in the command prompt and press Enter.
py -m pip install google-assistant-sdk[samples]
Step 13: After installation, copy and paste the below syntax and hit enter.
py -m pip install –upgrade google-auth-oauthlib[tool]
Step 14: Now open the Google Assistant folder from C: Drive and right-click the JSON file that you saved and created in step 11 and open it.
Step 15: Go to properties, select file name, and copy it. Now go back to the command prompt and type the below syntax.
google-oauthlib-tool –client-secrets C:\GoogleAssistant\
and paste the file name you just copied followed by a Space bar and then type the syntax below and hit Enter.
–scope https://www.googleapis.com/auth/assistant-sdk-prototype –save –headless
Step 16: You’ll see the command prompt running, and finally you’ll see the URL Shown right before the prompt asking you to Insert the authorization code. Select and copy the entire URL starting with https://.
Step 17: Now open a new browser and paste the URL into the address bar. Sign up Using the same Google Account credential. The dialogue box will display asking for access to Win Google Assistant. Click Allow.
Step 18: Later you will see a long string of characters mostly letters and numbers, copy it using the copy option at the side.
Step 19: Go back to the Command Prompt window and paste the characters you’ve just copied. This is the authorization code you were instructed to enter in Step 16. As soon as you hit Enter, you’ll see the ‘Credentials Saved’
Step 20: Finally, you have Google Assistant on your Windows 10.
Step 21: To test, copy the below syntax on your CMD prompt window.
py -m googlesamples.assistant.grpc.audio_helpers.
Your Windows 10 device will record 5 seconds of audio and play it back. If you hear the recording, the configuration of the Google Assistant is completed.
Step 22: Now, find the Project ID you copied and notes in Step 3 and type it in the CMD prompt window. Then press the Enter button.
Also Read | Download & Install Vidmate App On PC For Windows 10/8/7Mac/XP
Step 23: Type the syntax below followed by a space bar, enter the Project ID and click the space bar again and type in the command below and hit Enter to finish the Google Assistant setup on Windows 10.
register-model –manufacturer “Assistant SDK developer” –product-name “Assistant SDK light” –type LIGHT –model “GA4W”.
Step 24: If you prefer Google Assistant with a key to talk feature, type the syntax below in the CMD prompt window and press Enter.
py -m googlesamples.assistant.grpc.pushtotalk –device-model-id “GA4W” –project-id
Step 25: You can now hit Enter when the app is active and say whatever you want your Google Assistant to do.
How To Get Google Assistant For Chromebook/ Chrome OS Device
- Step 1: Go to Settings.
- Step 2: Scroll down to Search and Assistant and select Google Assistant.
- Step 3: Enable it by turning the slider on.
- Step 4: Allow the OK Google setting to permit the device to listen to and respond to the voice command. (Modify all other choices as required.)
That’s the guide about how to set up Google Assistant on Windows 10 PC and Chrome!