
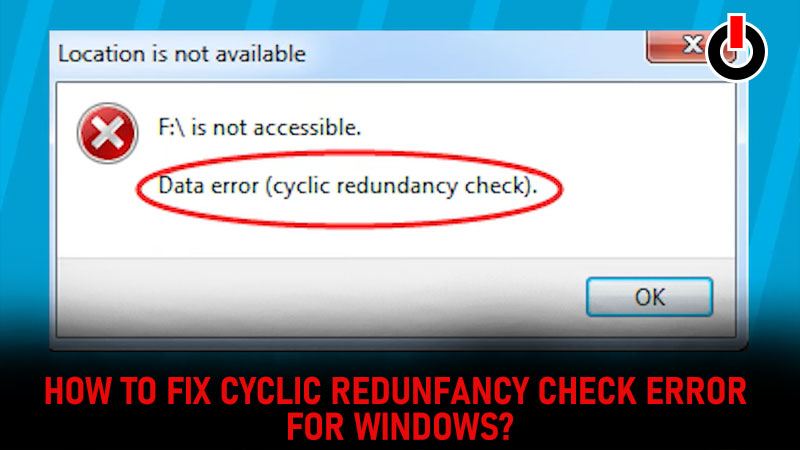
If you ever come across a Data Error (Cyclic Redundancy Check) notification and you are not able to access any files on your USB drive or any other drive on your computer. Here is a way to fix it and get your files back safely. There are several reasons for CRC error. Here is everything you need to know about the same.
Table of Contents
What Is Cyclic Redundancy Check Error & How To Fix It?
CRC ( Cyclic Redundancy Check) is an algorithm set by windows for basic verification of all the drives on your computer. It is activated automatically every time when you introduce a new on your computer. Eg. USB Drive
Here is a list of all the causes of CRC Error:
- Windows registry corruption
- Cluttered Hard drive
- Unsuccessful software installation
- Misconfigured files
Different Ways to Fix CRC Error:
1) The CHKDSK Utility
This is a utility designed by windows to check errors on the hard drive of your computer. Follow the steps to fix Cyclic Redundancy Check Error on your Windows PC.
1) Go to Start menu.
2) Type command prompt.
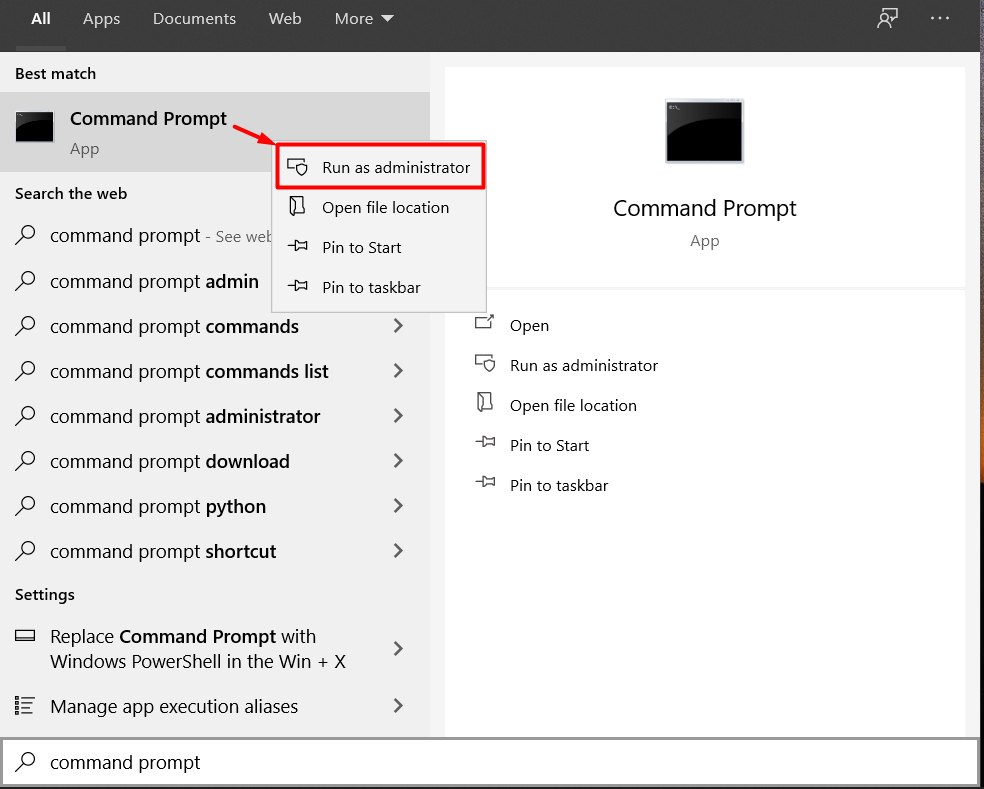
.3) Hit on Run as Administrator.
4) Type or copy-paste chkdsk d: /f /r /x Press ENTER Button.
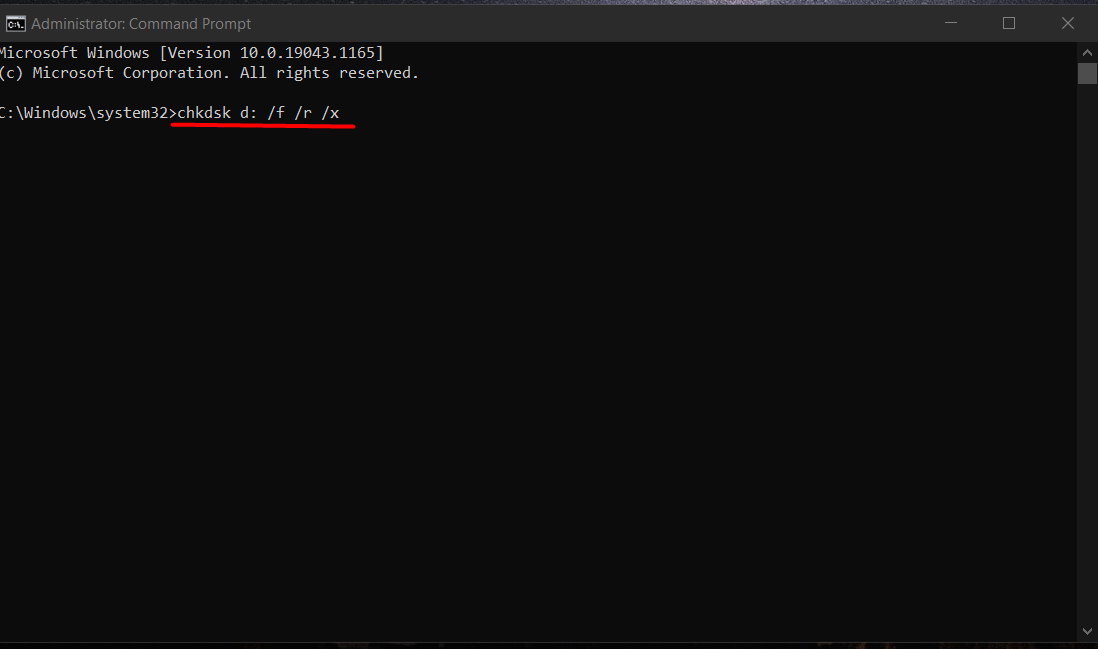
Now, wait for it to read problems.
Once done. Click on Close it and try opening your drive again. Hope the problem is fixed. If not, then we have more options to fix this issue.
2) SFC scanner
SFC Scanner is also known as System File Checker. Follow the steps to run the scanner and fix the Cyclic Redundancy Check error.
1) Go to Start menu.
2) Type command prompt.
3) Right-click on the command prompt.
4) Hit on Run as Administrator.
5) Type or copy-paste sfc /scannow Press ENTER Button.

Wait for it to read problems. Now it will run the scan through all the files in the drive. So, wait patiently till it completes the scan and then see if you can get access to the drive. If you are unable to get access we have one more solution for you.
3) Disk Check Utility
This is another free utility provided by Window. You can launch this from File Explorer or My computer.
1) Open File Explorer.
2) Right-click on the Drive you need to scan
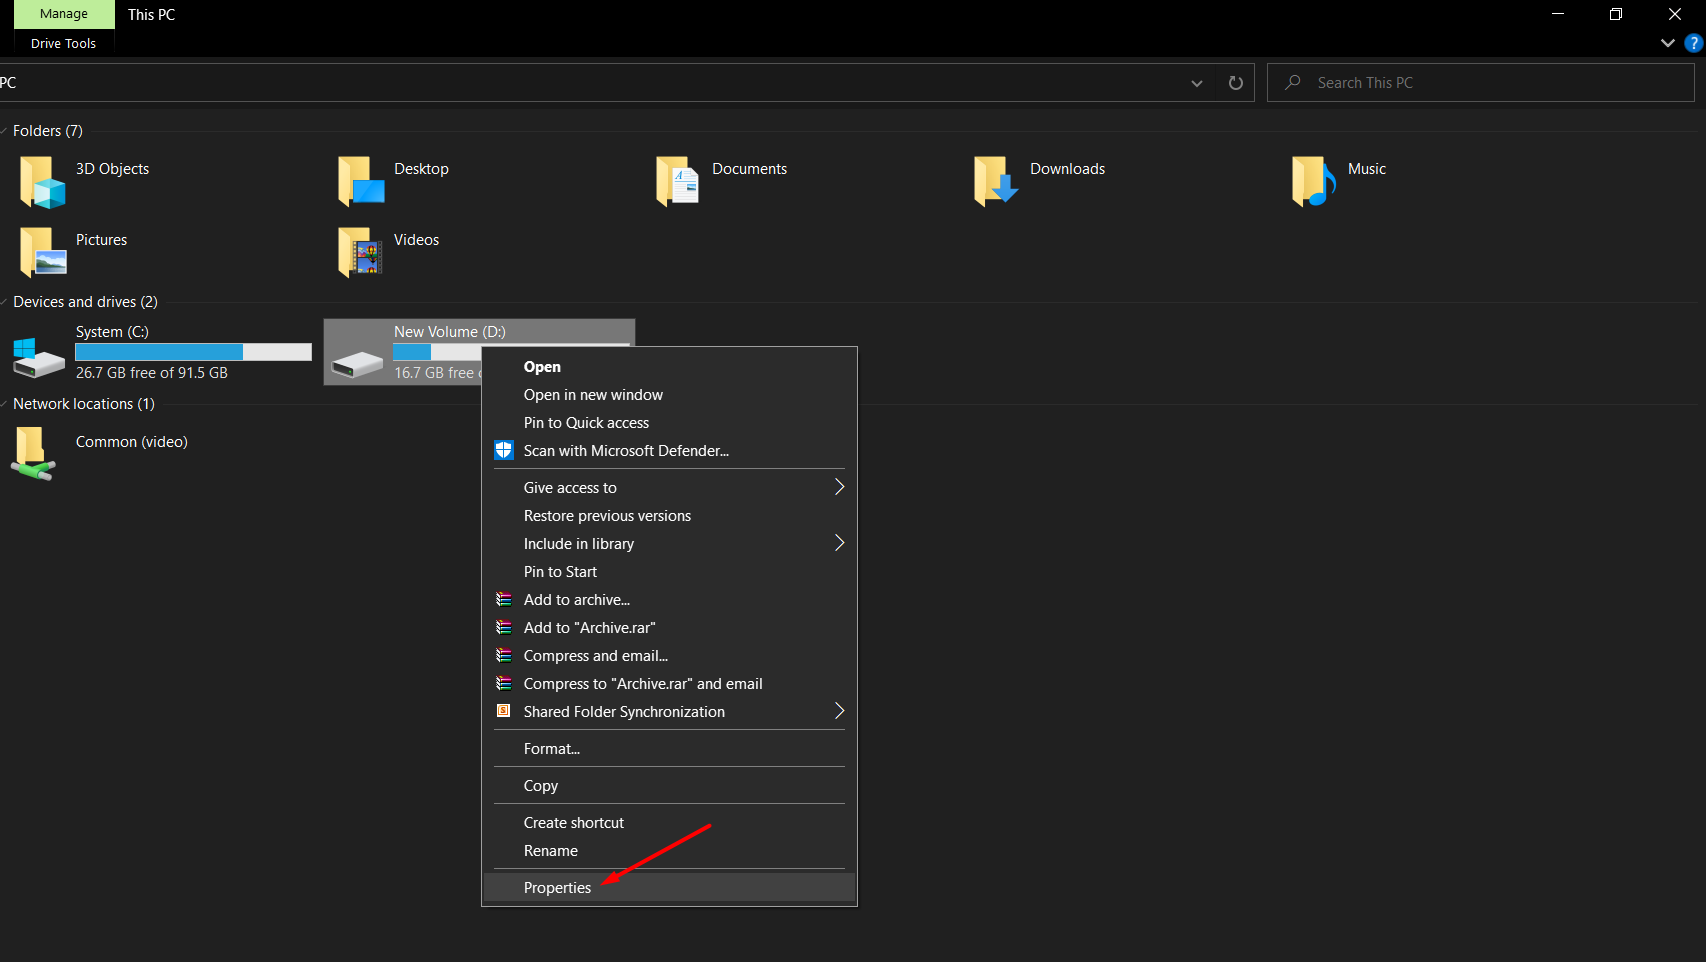
3) From the list Click on properties.
4) Go to Tools.

5) And click on the Check button.
Now one small Error Checking scanning box will appear. Let it complete the scan and click on the Close button once the scan is completed.
The disk check utility usually fixes the Software-related issues, if there are any! Try opening the drive again. Hope the CRC issue is fixed!
That’s everything about how to fix the CRC issue for Windows. Read another article about how to download Windows 11 ISO files?