
The macOS has a staggering number of in-built features that will surely make your work a lot easier and there is no doubt about it. There is one thing that people don’t get in MacOS is it does not allow users to record audio while recording the screen on macOS.
Yes, if you are recording the screen on macOS using Quick Time Player, you will have to either use a third-party application or use the external mic to record audio. Now, we have discovered a way that would not require you to use any third-party app or an external mic to record audio on macOS.
Yes, the way we have found will allow you to record internal audio of your Mac. If you don’t know how to record internal audio during screen recording on macOS then keep reading this post.
How to Record Internal Audio During Screen Recording on MacOS
It is straightforward to add an option to record internal audio during screen recording on macOS. However, if you don’t know how to do it then follow these steps.
- Download Soundflower and install it on your macOS.
- Go to ‘Audio MIDI setup’ on your Mac and search for ‘+’ button that can be found in the bottom left corner of the screen.
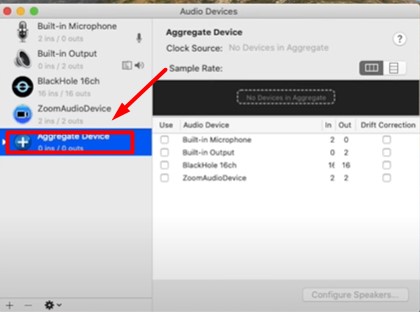
- Click on ‘+’ button and create an ‘Aggregate Device’ and rename it ‘Quick Time Player Input’. You can rename it by double-tapping on ‘Aggregate Device’.
- Once renamed, you will have to select ‘Blackhole 16ch’.
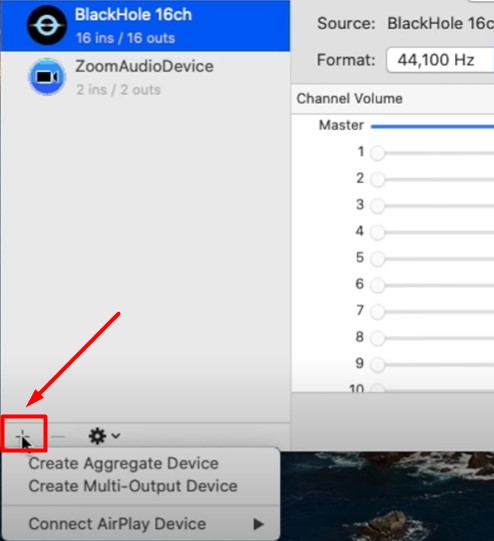
- Now, click on the ‘+’ button again. But this, you will have to create a Multi-Output Device.
- Once created, rename it Screen Recorder With Audio. Now, on the right side of the window, you will have to select “built-in output” and “Blackhole 16ch”.
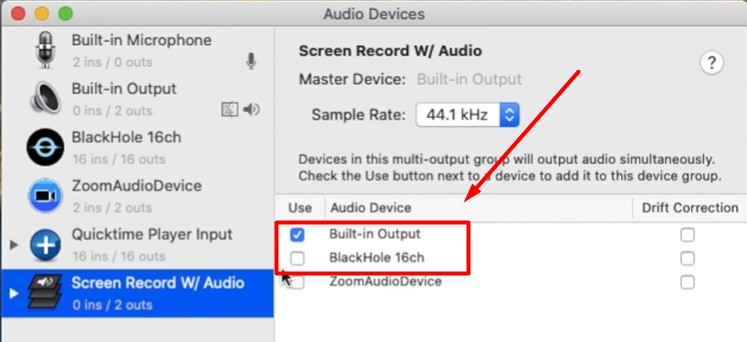
- For the unversed, ‘built-In Output’ is an option that records audio where you are recording screen on macOS. So, make sure to select it.
- Make sure, you have selected Built-in-Output in the Master Device option.
- Once you are done making these changes on your Mac, you simply need to go to the System preferences and then go to the Sound option.
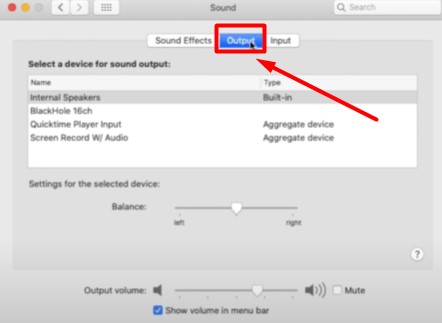
- In the Sound option, you will have to go to the Output tab. There you will see multiple options. You will have to select Screen Record With Audio.
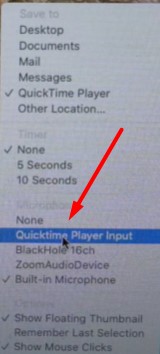
- Now, you can go to Quick Time Player and go file>New Screen Recording. When you go to the New Screen Recording option, you will have the Built-in Microphone option selected. You will have to change it to Quick Time Player Input.
- Once you do this, you will get all the audio that is happening inside of your macOS.
That’s everything you need to know about how to record internal Audio during screen recording on MacOS in 2022.