

Want to play Project Zomboid multiplayer? If your answer is YES then you have come to the right place. The Indie Stone had recently introduced a multiplayer server ‘Build 41’ to Project Zombroid, allowing players to play with their friends. If you have purchased the game from Steam and want to play it with your buddies but don’t know how it works then look no further as we have got you covered.
This post will walk you through the process of unlocking the Multiplayer Build 41 for Project Zomboid on Steam. Without any further delay, let’s get started:
How to play on Multiplayer Servers in Project Zomboid!
The process of playing on a multiplayer server in Project Zomboid is straightforward. Those who want to play this Zombiod Survival game with their friends but don’t know the procedure must follow the steps mentioned below:
- Launch Steam on your PC.
- Head to the Library section
- Find Project Zomboid and right-click on it.
- From the drop-down menu, select ‘Properties’.
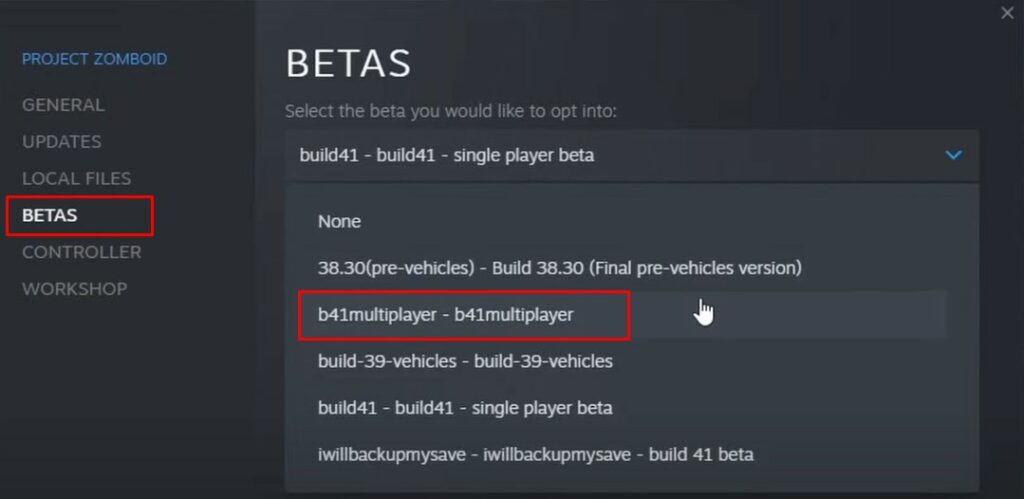
- From the side menu, click on the ‘BETAS‘ tab and then select ‘b41multiplayer-b41multiplayer‘ from the drop-down.
- Once selected, exit the Settings and wait until the update is downloaded.
- Once the update is finished, you will have Project Zomboid multiplayer enabled.
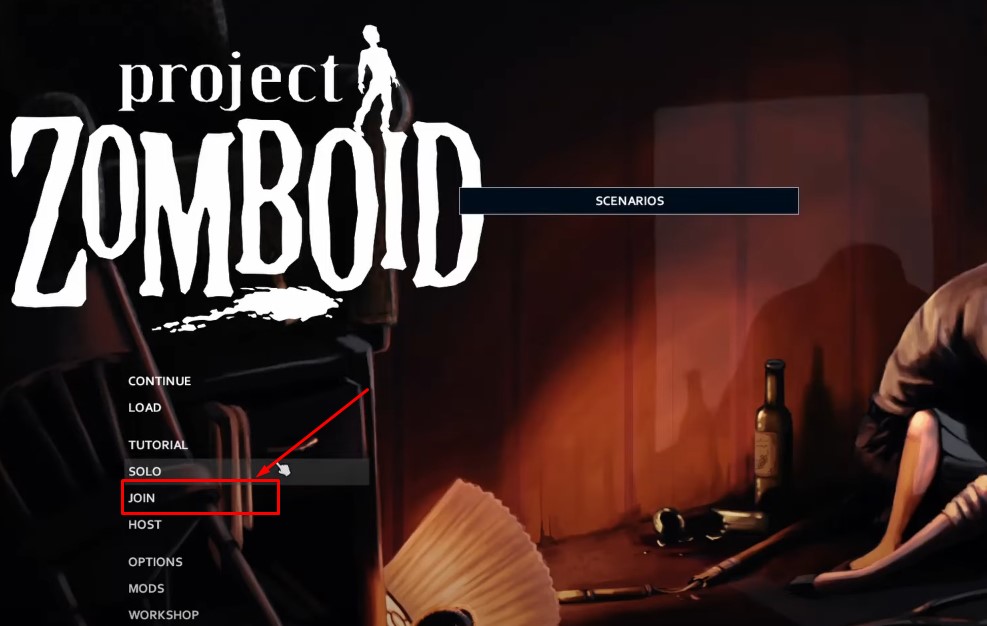
- Now, you will have to go to the main screen of the game and select ‘JOIN’.
- In a new window, click on the ‘Internet’ tab and select the multiplayer server.
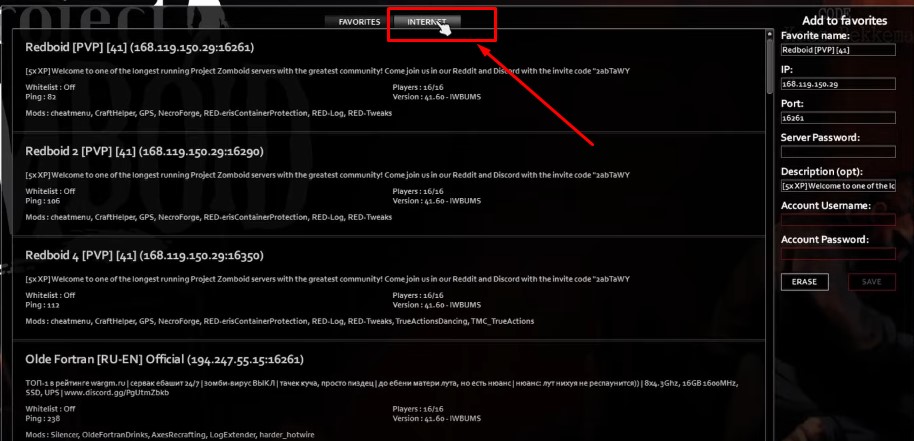
- Now, select the best server and enjoy the game to the fullest.
That’s all you need to know about how to play Project Zomboid with friends.