YouTube is undoubtedly one of the most popular video streaming platforms across the world. There are thousands of people across the world who create YouTube channels and upload videos on a daily basis to earn a lot of money but to make their dream come true, they will need tons of Subscribers.
In order to make viewers to subscribe their YouTube channel, content creators spend a lot of time making an incredible subscribe button animation. While you are here, you too must be looking for ways to create YouTube subscribe button and subscribe intro in 2021.
If that’s the case then don’t worry, in this post, we will explain how anyone can make subscribe button animation for their YouTube channel. Unlike other websites or YouTube channels, we would not use any paid or premium application or software to make YT subscribe button.
To make an incredible subscribe animation button, all you need is a Mobile application named Kinemaster. Yes, we will make this subscribe intro on Mobile phones.
Without any further ado, let’s get started.
How To Make Subscribe Button Animation For YouTube – June 2021
Before you start following the given steps, make sure you have downloaded Kinemaster on your Mobile. To download Kinemaster’s latest version, click on this link.

Once you have installed Kinemaster on your Android phone, launch it and select the 16:9 aspect ratio of your project, and tap on the Next button, which can be found on the top right corner of the screen.

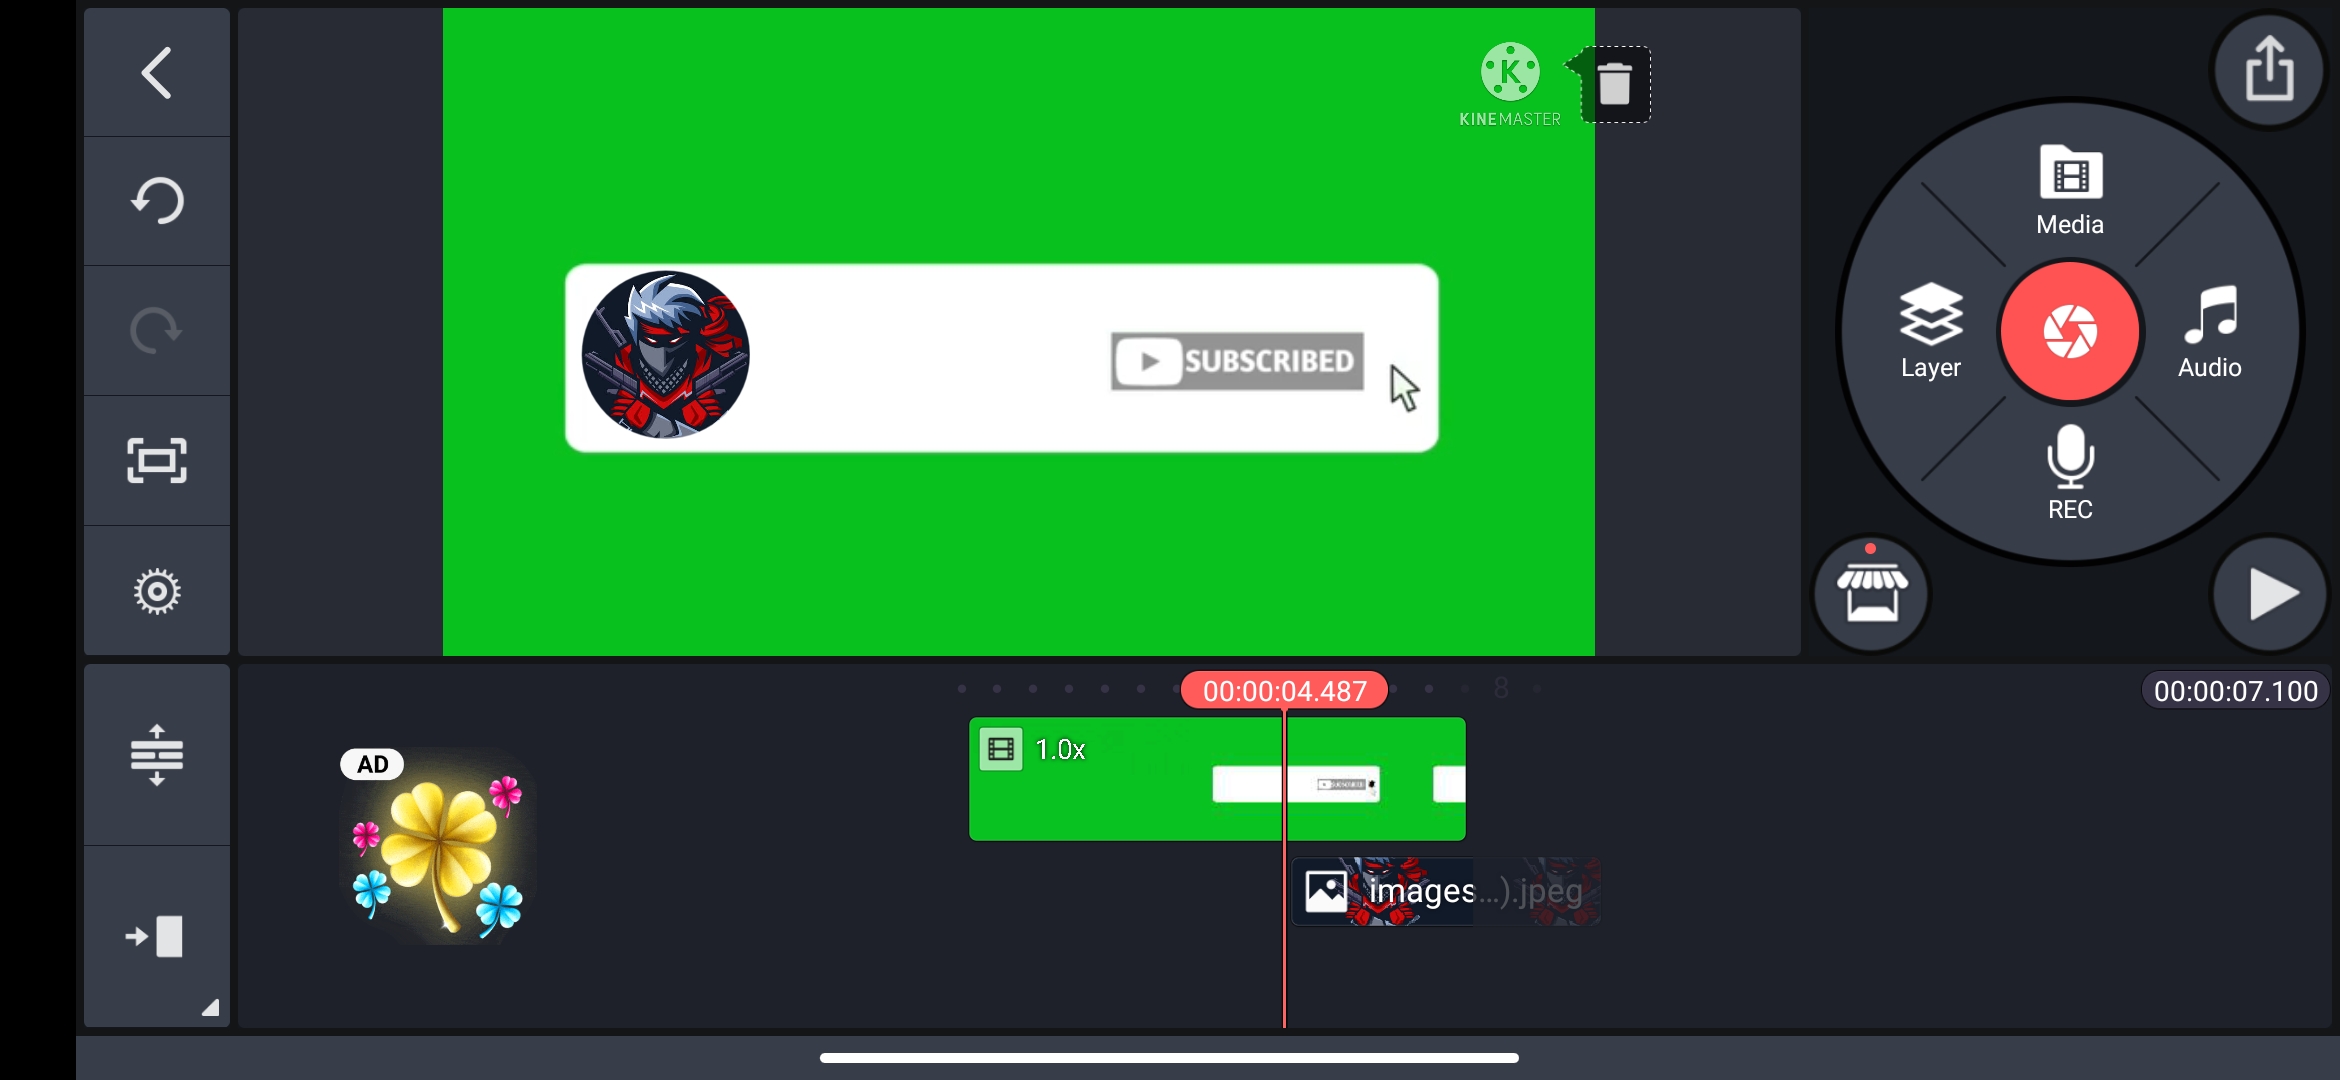
Once selected, you will have to tap on the Media option as shown in the above picture and add the animation file of the YouTube subscribe button. There are plenty of subscribe button animations available on the internet, you can add the desired one.
Making your work easier, we have provided links of a few that can be downloaded by clicking on this link.

Once you have successfully added a file, you will have to add your profile picture and your YouTube Channe’s name.

To add a profile picture on your YT subscribe button animation, tap on the Layer option. When you do this, multiple options will pop up on the screen. You will have to tap on the Media option and add your Profile picture.

After adding your profile picture, you simply need to go to the Cropping option and enable the Mask option. When you do so, the Shape option will be enabled. Once enabled, you will have to go into it and adjust your profile picture in a Circle shape as shown in the above picture.
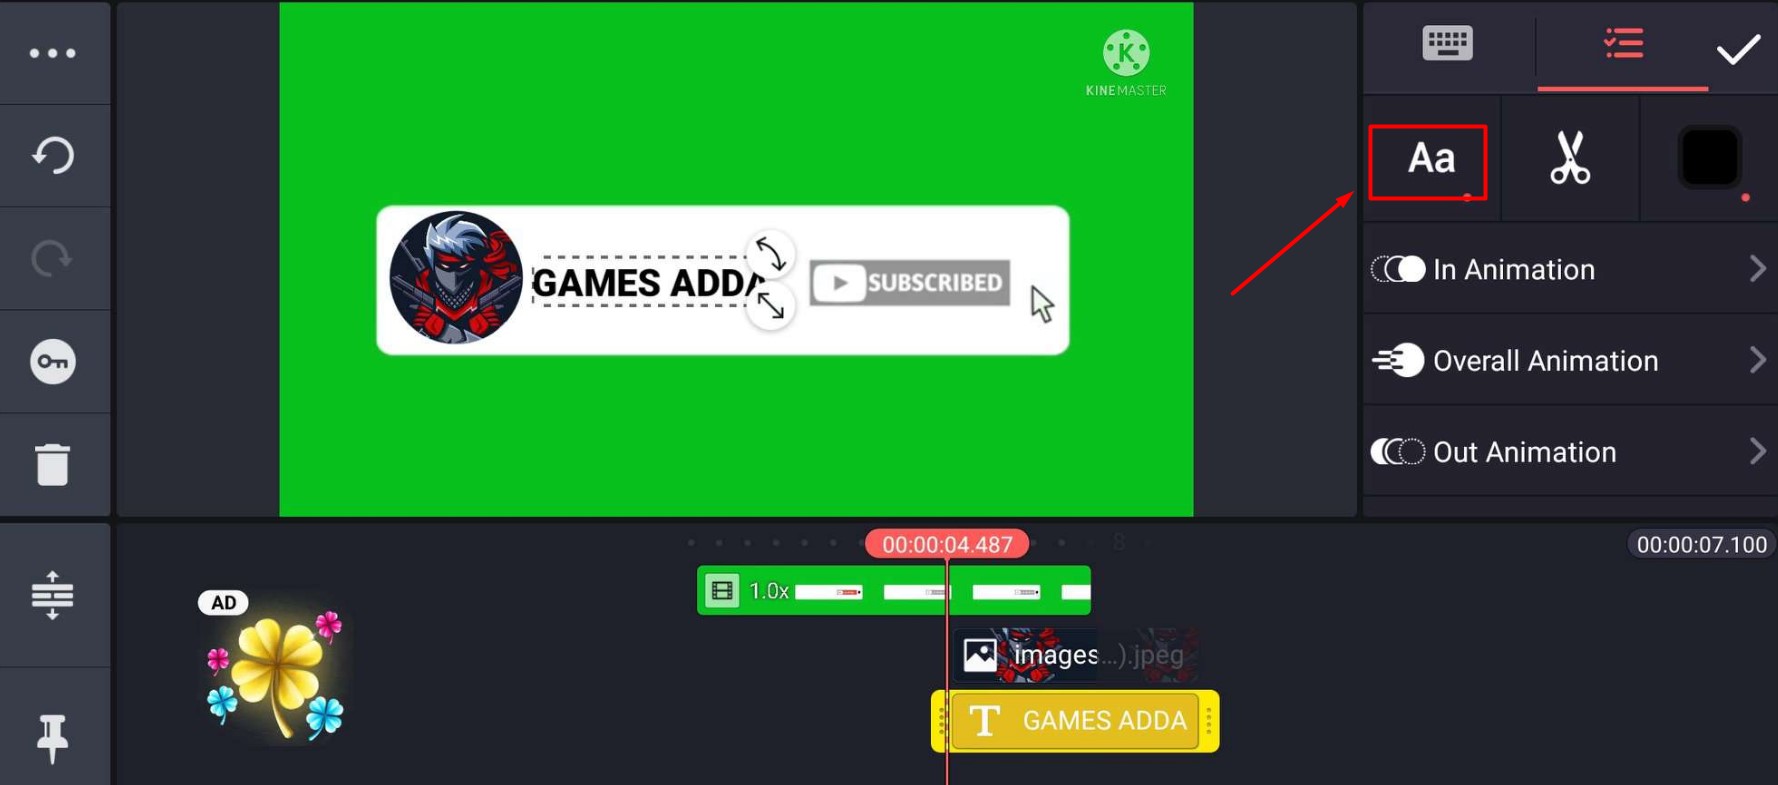
Now, it is time to write your YT channel’s name. To write the name, you will have to go to the Layer option and select the ‘Text’ option. After writing the name, you can select the color of the text as well.

You can also change the fonts of the name by going to the Aa option as shown in the above picture. I selected Roboto Black font for our subscribe button. You can select any font you like the most.
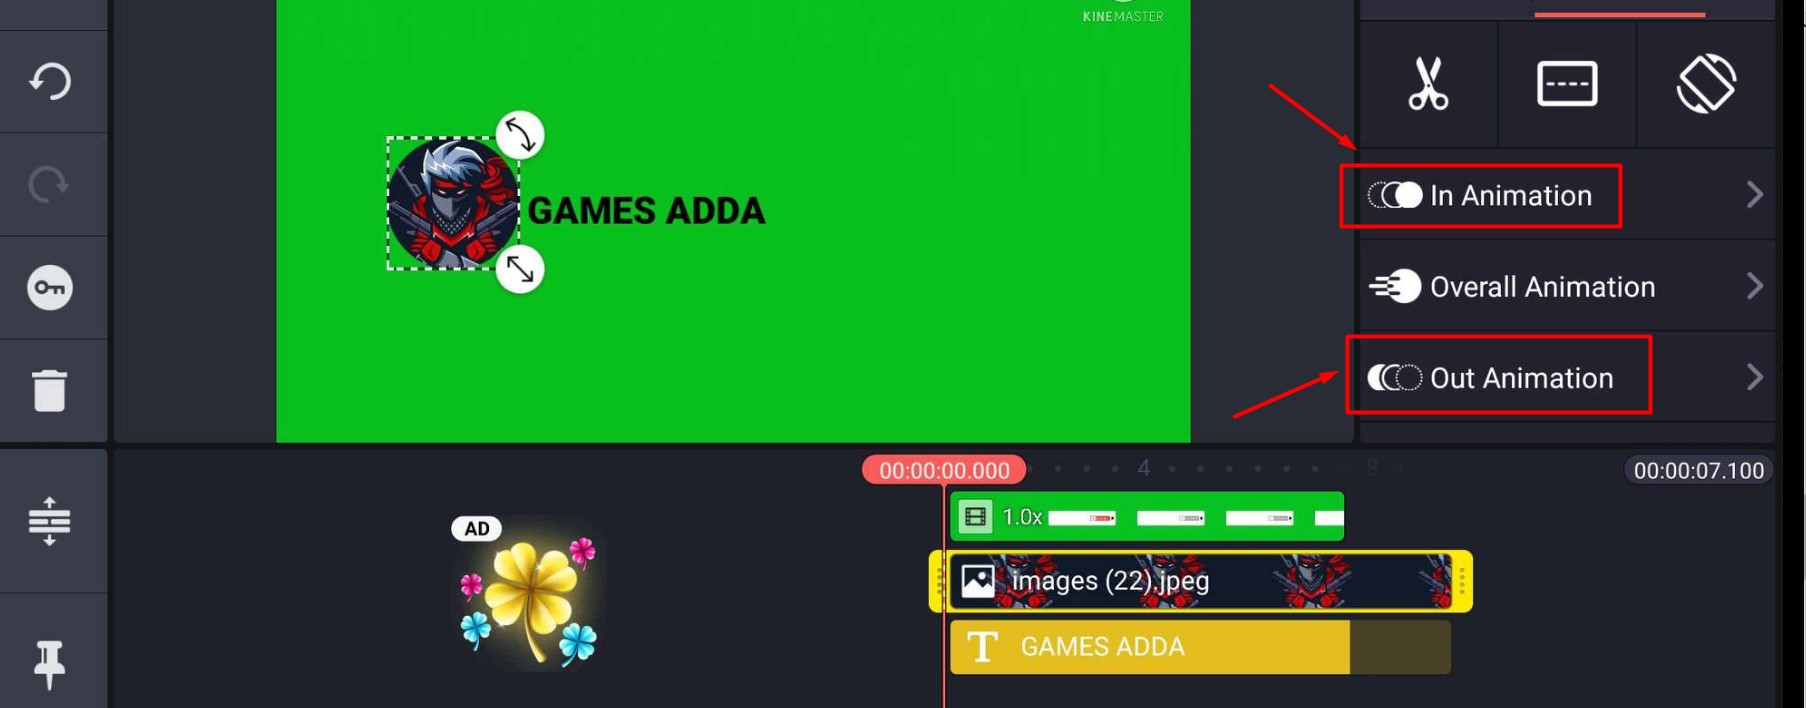
Once have added your profile pic and adjusted your name on the Subscribe button animation, it is time to add Animation to them. Make sure all three layers start from the beginning.

To add animation on photo and name, you will have to tap on their layers and go to In Animation option and select ‘Slide Up’. Once done, you will have to go to Out Animation and select ‘Slide Down’.

That’s It. You have successfully made subscribe button animation for your YouTube channel. Once you have created it, you will have to export it by tapping on the share option, which can be found on the extreme top right corner of the screen.
If you want to use this subscribe button on your YouTube video, add the video on which you want to add this button by tapping on the Media option.

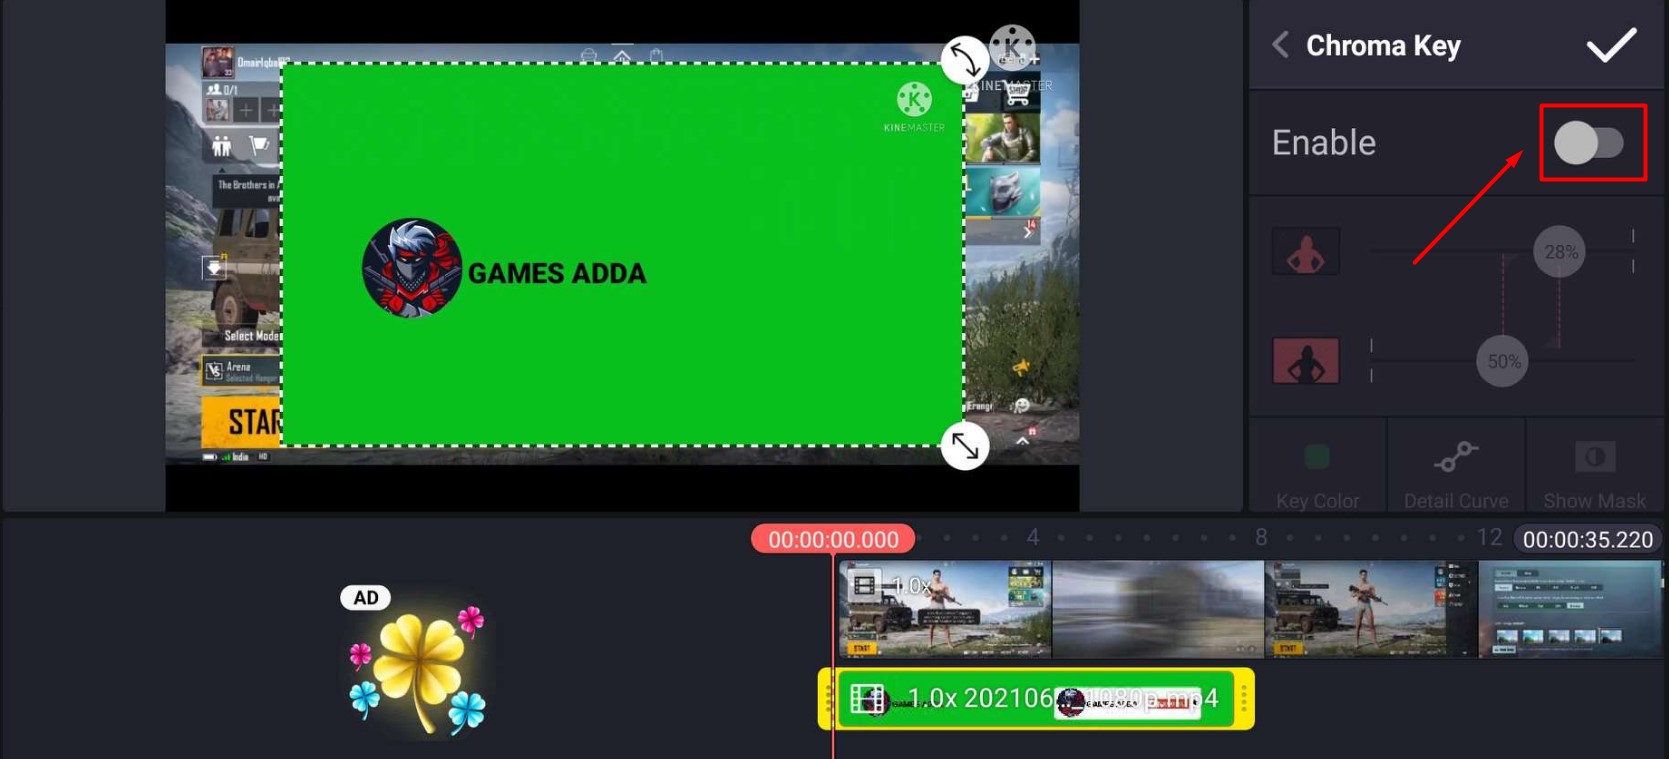
Once you have added a video, tap on the Layer option and then tap on the Media option and add the exported file of the button. After adding the file, you will have to enable Chroma Key. The Chroma option can be found below the Out Animation option.

When you enable Chroma Key, you will notice that the background Green screen will vanish and this is how your subscribe button will look like. (see above picture).
The process of making subscribe button animation for files that we have provided above is the same. You simply need to select the desired formate and follow the same steps that we have mentioned here.
If you have any doubts related to this topic, do let us know in the comment section below.

